

 AI-Powered
 How to Winterize Sprinkler System
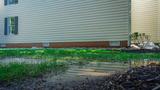
Now that summer is over and your lawn no longer needs constant watering, it’s time to prepare your home and garden for the colder months. Winter brings a long list of tasks to consider, and one of the most important is protecting your sprinkler system. Proper sprinkler winterization is crucial to avoid costly damage caused by freezing temperatures.
Here’s a step-by-step guide to ensure your sprinkler system is ready for winter.
When to Winterize Your Sprinkler System
The best time to winterize sprinkler system components is in the fall, as temperatures begin to drop. Ideally, you should take action when daytime highs consistently fall below 50°F, and nighttime temperatures are nearing or at freezing.
Waiting too long increases the risk of water freezing inside your sprinkler system. Winterizing at the right time ensures all water is effectively removed from the pipes and components, protecting your system from costly damage. By staying ahead of the freeze, you can safeguard your irrigation system and avoid the headaches of spring repairs. Proper sprinkler winterization isn’t just a task—it’s a crucial step in maintaining the longevity and efficiency of your sprinklers.
Steps to Winterize Sprinkler System
1. Turn Off the Water Supply
Start by shutting off the main water valve to your sprinkler system. This prevents any additional water from entering the pipes.
- Locate the main water supply valve, typically near your water meter or inside a basement or utility area.
- Turn the valve to the “off” position.
- If your system has a backflow preventer, ensure it is also turned off to avoid pressure buildup or damage.
2. Open Drain Valves
Once the water supply is off, release any remaining water from the system through manual or automatic drain valves.
- Manual Drains: Locate the manual drain valves at the lowest points of the system. Open them to allow gravity to drain water from the pipes.
- Automatic Drains: Some systems have automatic drain valves that activate when pressure drops. Verify that these valves are functioning properly.
- Be patient and allow all water to drain completely before moving to the next step.
3. Use an Air Compressor
A sprinkler blowout is the most reliable way to remove water from the system entirely. Here’s how to do it safely and effectively:
- Choose the Right Compressor: Use a compressor with a minimum capacity of 10 cubic feet per minute (CFM) at 80 pounds per square inch (PSI). Avoid excessive PSI to prevent damaging sprinkler heads or pipes.
- Attach the Compressor: Connect the compressor to the blowout port on your sprinkler system. This port is usually located near the main shutoff valve or backflow preventer.
- Blow Out Each Zone:
- Start with the zone farthest from the compressor.
- Slowly increase air pressure and watch for water spraying from the sprinkler heads.
- Once only air comes out, move to the next zone.
- Repeat for all zones to ensure no water remains.
- Safety Tip: Always wear protective eyewear and avoid standing near sprinkler heads during the blowout process.
4. Insulate Components
To protect your system further, insulate any exposed components that could freeze during winter.
- Pipes: Wrap exposed pipes with foam pipe insulation or heat tape.
- Backflow Preventers and Valves: Use insulated covers designed specifically for backflow preventers or secure them with heavy-duty foam insulation.
- Sprinkler Heads: Remove above-ground sprinkler heads if possible, or cover them with insulation caps.
Proper insulation adds an extra layer of protection, particularly in areas with harsh winters.
Additional Tips for Sprinkler Winterization
- Check the Manufacturer’s Guidelines: Always refer to your system’s manual for specific instructions on how to winterize sprinkler system components.
- Test the System in Fall: Before winterizing, run the system to identify leaks or issues that need repair.
- Hire a Professional: If you’re unsure about performing a sprinkler blowout or lack the proper equipment, hiring a professional can save time and ensure the job is done correctly.
What Happens If You Don’t Winterize Your Sprinklers?
Failing to winterize sprinkler system components leads to several issues, including:
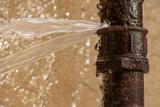
- Cracked Pipes: Water left in pipes can freeze, expand, and crack, leading to costly repairs.
- Damaged Sprinkler Heads: Ice can destroy the internal mechanisms of sprinkler heads, making them unusable.
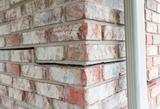
- Foundation Problems:
- Frozen pipes beneath or near your foundation can burst, causing water to seep into the ground and weaken your home’s structural integrity.
- Excess water around your foundation during freeze-thaw cycles can lead to soil erosion and cracks in the foundation.
- Leaking Valves: Water left in valves can freeze, causing them to crack and leak.
- Reduced Lifespan of the System: Regular damage from freezing water can shorten the life of your sprinkler system.
Forgot to Winterize Your Sprinklers? Groundworks Has You Covered

Life gets busy, and it’s easy to forget tasks like winterizing your sprinklers until it’s too late.
If you’re now dealing with the consequences—like foundation damage, water intrusion in your basement or crawl space, or cracked concrete—Groundworks is here to help.
While we don’t winterize sprinklers, we specialize in repairing the problems that come from skipped maintenance. With our expert solutions, you can rest easy knowing your foundation is strong, your basement and crawl space are dry, and your concrete is restored.
When it comes to protecting your home, Groundworks is your trusted choice.
Sprinkler Blowout FAQs
No, antifreeze is not recommended for sprinkler systems as it can damage components and contaminate your lawn. A sprinkler blowout is the safest method.
Once the risk of freezing temperatures has passed, typically in late spring. Ensure all components are inspected and reactivated properly.
It’s best to keep relative humidity below 60%, with ideal ranges falling between 30-50%.
