Crawl Space Vapor Barrier: 8 Easy Install Steps
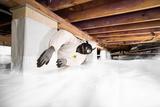
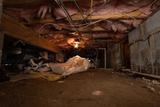
Crawl spaces are damp, dusty, and all around dirty, so it’s no surprise if you haven’t been down there much. But what if that wasn’t the case? What if you could create a clean, dry, usable crawl space?
Well, you can with a crawl space vapor barrier. Thanks to modern innovation, vapor barriers are some of the most effective crawl space encapsulation tools on the market. In this article, we’ll explore why a vapor barrier in crawl space is beneficial and how to install one beneath your home.
Why Is a Vapor Barrier in Crawl Space Important?
While less than 10 percent of newly built homes have a crawl space foundation, it’s important to understand what can happen without a vapor barrier.
Moisture poses a huge threat to your home. When water (or water vapor) gets below your home, it is absorbed by the wooden structural supports found in most crawl spaces. Over time, this leads to problems like mold, wood rot, or sagging floors. A wet, damp crawl space is also an ideal breeding ground for insects and rodents.
Sealing this area with a crawl space vapor barrier is a great way to keep your home healthy. It ensures your family breathes cleaner air and wooden support beams below your home stay safe.
A vapor barrier alone is not enough. For the most efficient protection, we recommend installing a dehumidifier, crawl space drains, a sump pump, and insulation alongside your vapor barrier to create a comprehensive encapsulation system.
How Does a Vapor Barrier for Crawl Space Work?
In short, crawl space vapor barriers cover the walls and floors of your crawl space to seal out moisture. According to the U.S. Department of Energy, controlling the moisture in your home can make your home more energy-efficient and less costly to heat and cool.
Installing one prevents water vapor and ground moisture from entering the crawl space and causing problems. Remember that a crawl space vapor barrier can only offer its full benefits if it is airtight—air from outside must not be able to sneak in through walls, vents, or the floor.
This is where encapsulation from a trusted, professional crawl space repair company like Groundworks comes in.
Is Mold Removal Necessary First?
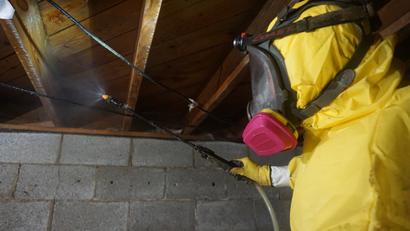
One of the common crawl space red flags is mold. Mold is often the first indication of a problem. So, is it important to remove the mold before installing a vapor barrier?
The answer depends on how long the problem has been festering and how much mold is present at the time of installation. While the United States Environmental Protection Agency says if mold covers less than 10 square feet (or a 3ft. by 3ft. area), you can clean the mold yourself, it’s best to err on the side of caution. Entering your crawl space and exposing yourself to mold and other problems can be dangerous, so it’s best to contact a mold remediation specialist for safe and effective removal.
Mold needs three things to survive: water, food, and oxygen. Without these three elements, mold will cease to exist. Since oxygen and food (dead organic materials) like wood, aren’t going anywhere inside your crawl space, removing water is the easiest way to prevent mold below your home.
In this case, installing a crawl space vapor barrier during encapsulation removes water from the equation. However, if your crawl space has a large amount of mold, it’s a good idea to have it removed by a professional before moving forward with a vapor barrier installation.
How to Install Vapor Barrier in Crawl Space: Step-by-Step
At Groundworks, we understand that every home is different and presents various challenges. We only recommend and install solutions tailored to meet your home’s needs.
The crawl space vapor barrier installation and encapsulation process can vary depending on each home’s condition. However, here is a general overview of how our crews complete these essential repairs:
Step 1: Diagnosis
Before installing a vapor barrier, it’s important to do a full inspection and determine the cause of the crawl space problem. Is groundwater entering from the floor or walls? Are open vents trapping humid air inside? Is a plumbing leak dripping into the space? Ensuring the solution matches the root problem goes a long way to preventing future problems.
Your local Groundworks inspector will consider your neighborhood’s unique soil type, the typography of your home, and the weather conditions before making repair suggestions.
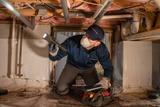
Step 2: Crawl Space Clean Up
The crawl space then needs to be cleaned.
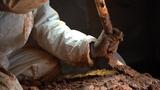
This step may look different for everyone depending on the condition of the crawl space. If there is water in the crawl space, it’s beneficial to dry it out with a submersible pump, fans, or a dehumidifier. Sometimes, this process may take a while. Consider mold remediation if needed.
All fallen, wet insulation and scrap building material should be bagged and removed.
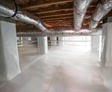
Step 3: Crawl Space Grading & Preparation
Next, the crawl space floor should be free of large rocks and debris, including any pests that might be inside. Collapsed insulation also needs to be removed. Finally, the soil should be raked to establish a rough grade.
Step 4: Seal Crawl Space Vents
It’s crucial to close and conceal any open crawl space vents to avoid air, water, and pest intrusion. Your local Groundworks company will custom-fit blocks of insulation panels in the interior vent opening before fully encapsulating the crawl space. Exterior vent covers can be added upon your request.
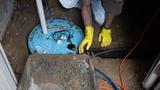
Step 5: Install Waterproofing Measures
Afterward, depending on the amount of water in your crawl space, consider installing a specially designed crawl space sump pump or other drainage options to remove any water that would remain beneath the vapor barrier.
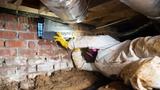
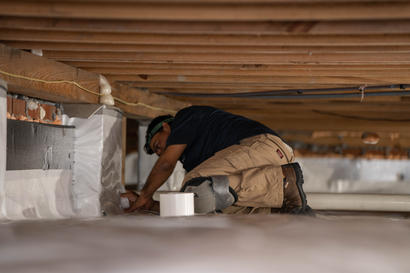
Step 6: Insulate Walls
Then, the wall insulation is attached to the interior crawl space walls with either an adhesive or a special masonry fastener.

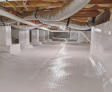
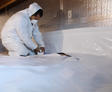
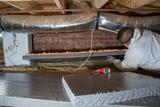
Step 7: Install the Vapor Barrier Liner
Next, our team measures and cuts a high-quality, 20-mil vapor barrier to fit the crawl space, allowing several inches to run along the walls. We ensure a tight fit by overlapping seams with double-sided tape.
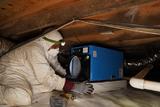
Step 8: Condition the Air
Finally, now that your crawl space has been sealed, you need to establish positive airflow. This is accomplished with an energy-efficient crawl space dehumidifier.
Groundworks: Crawl Space Vapor Barrier Experts
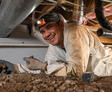
While installing a crawl space vapor barrier is fairly straightforward, it can be exhausting, back-breaking work in a tight, small area. The experts at Groundworks install vapor barriers and encapsulate crawl spaces every day. As a result, we have the best products and procedures to make installation simple and effective. Our 20-mil crawl space vapor barrier locks out moisture and soil gases and is covered by a nationally backed, long-term warranty.
Crawl space problems worsen with time, making proper encapsulation crucial. Let Groundworks work hard and eliminate your crawl space issues for good. Contact us today to schedule a free inspection!
Crawl Space Vapor Barrier FAQs
Yes, a vapor barrier is necessary in a crawl space to prevent moisture from seeping through the soil and creating dampness, mold, and structural issues. A properly installed crawl space vapor barrier helps maintain healthy air quality in your home and protects your foundation from moisture-related damage.
A vapor barrier is a plastic liner laid on the crawl space floor to block ground moisture, while encapsulation is a comprehensive system that completely seals the entire crawl space, including walls, floors, and open vents. Encapsulation provides superior moisture control and typically includes additional components like dehumidifiers and drainage systems.
While it’s possible to install a crawl space vapor barrier yourself, it requires careful attention to detail, appropriate material selection, proper safety equipment, and thorough preparation of the crawl space. Professional installation is recommended to ensure proper overlap, sealing of seams, and coverage around obstacles, as improper installation can lead to moisture issues.